
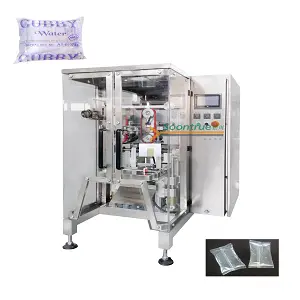
An automatic milk packing machine performs a continuous cycle to package milk. You can see the machine use a roll of plastic film to form a vertical tube. It fills this tube with a precise volume of milk. Finally, heat and pressure seal and cut the tube into individual pouches. This automated process creates major efficiency gains.
| Machine Type | Pouches per Hour |
|---|---|
| Manual Milk Packing | 300 |
| Automatic Milk Packing | 2400 |
This efficiency is vital in a large and growing market. The global milk packaging industry shows steady expansion, underscoring the need for fast and reliable technology.
| Metric | Value |
|---|---|
| Market Size in 2024 | USD 41.2 Billion |
| Forecast Period CAGR (2025 – 2034) | 4.8% |
| Market Size in 2034 | USD 65.2 Billion |
Step 1: Pouch Forming from Film
The journey from a simple roll of plastic to a sealed milk pouch begins with a precise forming process. You can watch as the machine transforms a flat sheet into a perfectly shaped tube, ready for filling. This initial step is critical for the integrity and appearance of the final product.
Film Unwinding and Tension
Everything starts with a large roll of specialized plastic film mounted at the back of the machine. The machine unwinds this film and guides it toward the forming area. Maintaining the right amount of tension on the film is extremely important.
An automatic tension control system ensures the film remains taut and smooth. This system prevents common problems like wrinkles or stretching. It carefully manages the film's path, creating a wrinkle-free conveyance from the roll to the forming tube. This automatic regulation guarantees a consistent and high-quality pouch every time.
Pro Tip: Advanced tension systems are engineered to reduce shaft deflection and manage the web path through idler rollers. This design is key to achieving a perfectly smooth, wrinkle-free film fit for every pouch.
Tube Formation
Next, you will see the flat film travel over a special component called a forming collar. The forming collar, or shoulder, is a cone-shaped guide. Its primary job is to bend the flat film and shape it into a circular, tube-like form.
After passing the collar, the film wraps around a long, hollow pipe known as the forming tube. The two vertical edges of the film overlap around this tube. This overlap creates a seam that is ready for sealing. The width of the forming tube determines the final width of your milk pouch. The choice of film is also vital. Different films offer varying levels of protection and shelf life.
| Film Type | Materials Used | Barrier Structure | Shelf Life (Room Temp) |
|---|---|---|---|
| Single-layer | Polyethylene with white masterbatch | Non-barrier | ~3 days |
| Three-layer | LDPE, LLDPE, EVOH, black masterbatch | Light-blocking | ~30 days |
| Five-layer | LDPE, LLDPE, EVOH, EVA, EVAL | High barrier | ~90 days |
The film itself must have specific properties to work correctly in a high-speed milk packing machine:
·Smoothness: The film needs a low-friction surface to glide effortlessly through the machine.
·Tensile Strength: It must be strong enough to withstand the mechanical pulling forces without tearing.
·Surface Wetting Tension: The surface requires treatment, like corona treatment, so that printing ink adheres properly.
·Heat Sealability: The film must melt and fuse reliably to create strong, leak-proof seals.
Vertical Fin Sealing
With the film wrapped around the forming tube and its edges overlapped, the next action is to create the vertical seal. This seal runs down the length of the pouch and is often called a "center seal" or "fin seal."
The machine uses a pair of heated vertical sealing bars that press against the film's overlapping edges. For milk pouches made from polyethylene (PE) film, the most common method is impulse sealing.
Impulse sealing works by sending a quick pulse of electric current through a sealing wire. This instantly heats the wire, which melts the plastic layers together. The heat is only applied for a moment before the plastic cools and solidifies, forming a permanent, strong bond. This efficient process creates the vertical seam of the tube, preparing it to be filled with milk in the next stage.
Step 2: Precise Milk Filling
After the machine forms the vertical tube, the next critical stage is filling it with milk. You will see the system work with incredible speed and precision. This step ensures that every pouch contains the exact amount of milk, ready for the consumer. The process is a perfect blend of mechanical action and hygienic control.
Creating the Bottom Seal
Before any milk can be dispensed, the machine must seal the bottom of the film tube. This action creates the base of the pouch. A set of horizontal sealing jaws moves in to perform this task. These jaws are heated and apply pressure to the film.
This sealing action is remarkably efficient because it does two jobs at once. You can observe how the jaws create the bottom seal of the new pouch while simultaneously creating the top seal of the pouch below it.
1.The horizontal sealing jaws clamp the bottom of the open film tube. This creates the first seal for the new pouch.
2.This same action seals the top of the previously filled pouch hanging below it.
3.A cutter, often integrated into the jaws, then separates the finished pouch, which drops onto a conveyor belt.
4.The jaws release, leaving you with a vertically sealed tube that is now sealed at the bottom, forming an empty, open-topped pouch ready for filling.
Volumetric Dosing System
The heart of the filling process is the volumetric dosing system. This system's job is to measure a precise volume of milk for each pouch. Accuracy is key, as modern machines achieve a filling tolerance of just ±0.5% to 1%. This precision minimizes product waste and guarantees consistency for the consumer.
The milk packing machine uses a specific type of dosing system to achieve this. Common types include:
·Mechanical Piston Fillers: These use a piston moving inside a cylinder to draw in and then push out a set volume of milk.
·Flow Meters: These systems measure the volume of milk as it flows through a pipe and into the pouch, shutting off a valve once the target volume is reached.
·Pneumatic Dosing Systems: These use air pressure to control the filling process, offering reliable and clean operation.
Did You Know? You can easily adjust the fill volume on modern machines. Many systems use motorized controls, allowing you to change the dosing amount for different pouch sizes (e.g., 250 ml, 500 ml, 1000 ml) directly from the control panel without any manual tools.
Dispensing Milk into the Pouch
With the pouch formed and the volume measured, the milk is dispensed. The milk travels from a holding tank through sanitary pipes to a filling nozzle. This nozzle extends down into the open top of the pouch.
The design of the filling nozzle is critical for a clean and efficient fill. Special anti-foam nozzles are used to minimize turbulence as the milk enters the pouch. Some nozzles even dive to the bottom of the pouch and rise as it fills, which further reduces agitation and prevents foam. This ensures you get a full pouch of milk, not air.
Nozzles also feature anti-drip tips or shut-off valves. These features prevent milk from leaking between fills, keeping the sealing area clean and preventing product waste.
To ensure food safety, all components that touch the milk must meet strict sanitary standards. These parts are designed for easy and thorough cleaning. Key standards include:
·3-A Sanitary Standards: These are widely used in the dairy industry and set strict criteria for hygienic equipment design and materials.
·EHEDG (European Hygienic Engineering & Design Group): These guidelines ensure equipment meets European hygiene laws through practical design and testing.
These standards guarantee that the dispensing process is not only precise but also completely hygienic, protecting the quality and safety of the milk.
Step 3: Sealing, Cutting, and Discharge
You have now seen the pouch form and fill with milk. The final step is a rapid sequence of actions that seals the pouch, cuts it free, and sends it on its way. This stage completes the packaging cycle, turning the filled tube into a market-ready product.
Film Advancement
After the pouch is filled, the machine needs to pull more film down for the next pouch. You can see the film advance by a precise length. This length corresponds exactly to the height of one pouch.
Friction rollers or belts grip the film tube and pull it downwards. The control system ensures this movement is exact. This precision is vital for consistent pouch sizes and proper placement for the sealing and cutting jaws. The entire process is synchronized, so the film stops in the perfect position every time.
Top Sealing and Cutting
With the filled pouch in place, the horizontal sealing jaws close again. This single, efficient motion accomplishes two critical tasks at once. The jaws seal the top of the filled pouch below while also creating the bottom seal for the next pouch above.
Inside the jaws, a sharp blade performs the final action.
·A specialized cutoff knife blade moves quickly between the jaws.
·It makes a clean cut, separating the finished pouch from the film tube.
·The sealing and cutting actions are perfectly timed. The cut happens just after the seal is made, ensuring the blade does not compromise the seal's integrity.
This synchronized process guarantees that each pouch is securely sealed and neatly separated.
Pouch Discharge
Once cut, the finished milk pouch drops from the machine. You will see it land on a discharge conveyor below. This conveyor immediately carries the pouch away from the milk packing machine.
Conveyor systems are typically made of stainless steel to meet hygiene standards. Specialized designs like FlexMove or AquaGard conveyors are often used to handle flexible packages like milk pouches efficiently.
The journey for the pouch is not over. The conveyor transports the pouches to downstream equipment for secondary packaging. Common next steps include:
·Grouping pouches together.
·Placing the groups into crates.
·Using a cartoning machine to put them in boxes.
·Shrink-wrapping the groups for stability and sale.
This final handling prepares the milk pouches for shipping to stores.
Key Systems of a Milk Packing Machine
Several key systems work together inside a milk packing machine to ensure it runs efficiently, accurately, and hygienically. You can think of these as the machine's brain, heart, and immune system. Understanding them helps you see how the entire process is controlled and maintained.
The PLC Control Unit
The Programmable Logic Controller (PLC) is the brain of the operation. This advanced computer acts as the central controller, managing every action from the moment you start the machine. The PLC automates several key functions:
·It controls the machine's operating speed.
·It maintains the correct sealing temperature.
·It sets the precise weight for each pouch.
·It detects faults and triggers alarms.
You interact with the PLC through a Human-Machine Interface (HMI), which is usually a touchscreen panel. The HMI gives you a complete visual overview of the process. It shows real-time status updates and alerts you to any problems, simplifying troubleshooting and boosting your productivity.
The Dosing System
The dosing system is the heart of the filling process, ensuring every pouch gets the right amount of milk. While some machines use piston fillers, many modern systems use magnetic flow meters. Flow meters are ideal for dairy because they measure the milk volume without applying force, which protects the product's quality. They also make it easier for you to adjust fill quantities and are simpler to clean. To maintain accuracy, you must perform routine maintenance. Regular cleaning and inspection of pumps, valves, and seals prevent clogs and leaks.
Clean-in-Place (CIP) System
The Clean-in-Place (CIP) system keeps the machine hygienic without needing to take it apart. This automated system circulates cleaning solutions through all parts that touch the milk. A typical cycle includes these steps:
- Pre-Rinse: Flushes out leftover milk.
- Alkali Wash: Uses a caustic solution like sodium hydroxide to remove fats.
- Acid Wash: Uses an acid like nitric acid to remove mineral buildup, or "milk stone."
- Final Rinse: Washes away all cleaning agents with pure water.
Validation Check: After a CIP cycle, you can use tools like an ATP meter. This device checks for any remaining organic material, confirming the surfaces are truly clean and ready for the next production run.
You have seen how a milk packing machine performs a seamless cycle. It forms a tube from film, fills it with milk, and then seals and cuts the pouch free. This automated process gives you high speed, hygiene, and consistency, producing thousands of pouches every hour. The future of this technology is also advancing with exciting innovations.
Post time: Oct-14-2025